Photo to 3D Model — The Photographer's Guide to 3D Conversion
Converting a photo to a 3D relief is not pure magic — it is a direct translation of pixel brightness to physical height. The better your photo, the better your 3D print. This guide explains the photographic principles behind heightmap conversion: why side-lit portraits produce dramatic depth while front-flash selfies produce flat pancakes, which subjects work and which do not, and how to take photos specifically for 3D conversion. You do not need a professional camera — your phone is perfectly capable if you understand the lighting.
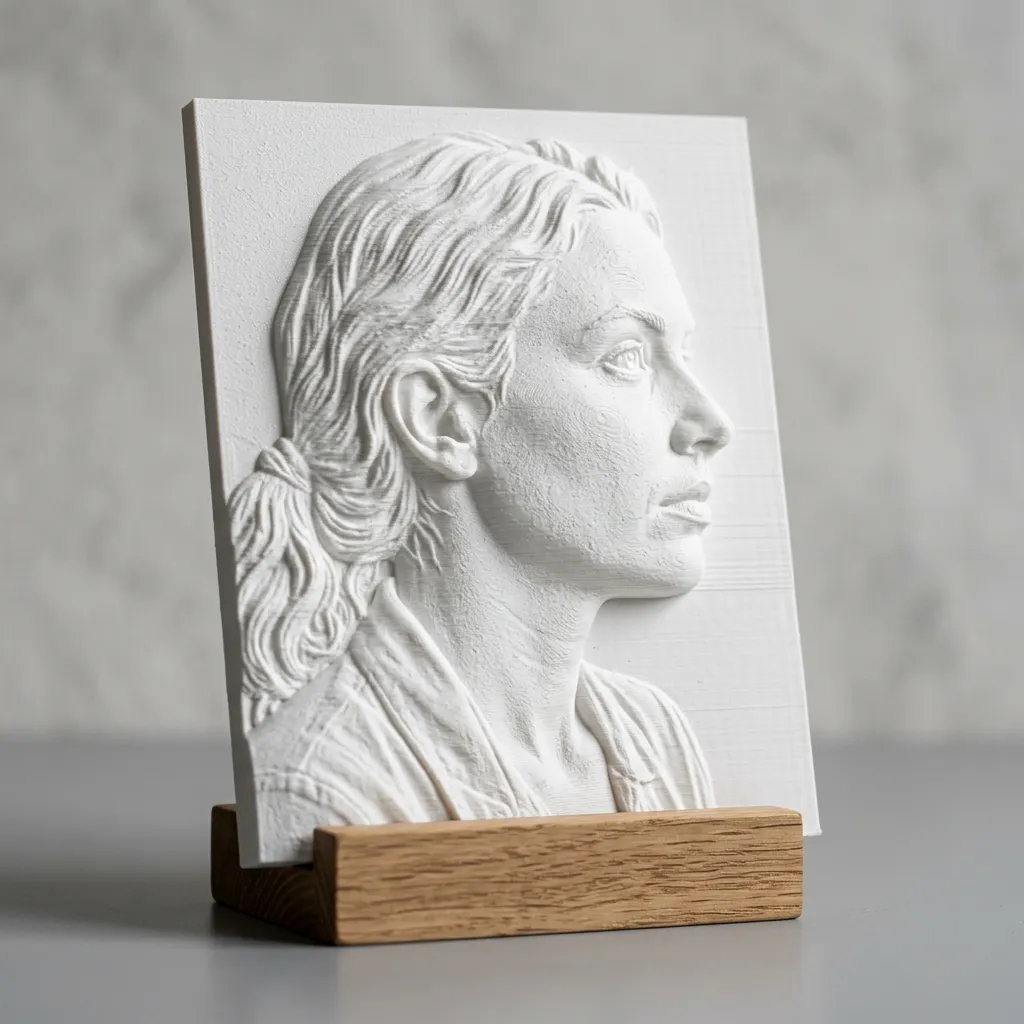
Lighting: The Single Most Important Factor
The heightmap algorithm does not understand objects, faces, or shapes. It only sees brightness. Lighting that creates natural shadows and highlights translates directly into 3D depth. Here is how different lighting setups affect the result.
Side Lighting — Best for Depth and Contrast
Light coming from one side (left or right) creates natural shadow gradients across the subject. A face lit from the left will have highlights on the left cheek and shadows on the right — exactly the brightness variation needed for a 3D relief. This is the optimal lighting for photo-to-3D conversion. Position your subject near a window (natural light), or use a single desk lamp placed to one side. Avoid direct overhead sun which creates harsh shadows under the eyes and nose.
Front Lighting — Worst for 3D Depth
Light coming from directly in front of the subject (on-camera flash, ring light) eliminates shadows entirely. The result is a uniformly bright image with minimal brightness variation — which produces a flat, nearly featureless 3D relief. Avoid front flash for photo-to-3D conversion. If you must use front lighting, increase the height scale to exaggerate what little brightness variation exists, and expect the result to be shallow.
Top/Down Lighting — Good for Landscapes
Light from above (typical outdoor daylight) works well for landscapes and scenes where natural shadows occur in recessed areas. Buildings cast shadows downward, valleys appear darker than hilltops. This creates a natural topographic heightmap where elevated areas are brighter and depressions are darker — exactly matching the physical geography.
Subject Guide: What Converts Well (and What Does Not)
Portraits and Faces — Excellent
Faces have natural contours that create brightness variation even in flat lighting. A side-lit portrait converts beautifully into a relief resembling a coin or medallion. Best practice: Subject facing slightly away from the light source. Avoid heavy makeup which flattens natural skin texture. Black and white conversion before uploading often improves the result by removing color distractions and letting you focus on tonal values.
Pets and Animals — Good with Conditions
Fur texture creates natural brightness variation that translates well to subtle surface detail. Dark-colored pets are challenging because their fur absorbs light and produces a uniformly dark heightmap. Best practice: Photograph dark pets against a light background, increase exposure slightly, and boost contrast in post-processing. A dark dog on a dark couch will produce an almost invisible relief.
Landscapes and Cityscapes — Excellent
Natural or architectural landscapes with clear foreground/midground/background separation produce stunning topographic reliefs. Mountains against sky, buildings with visible facades, and scenes with strong perspective all work well. Best practice: Shoot during golden hour when long shadows add depth. Include foreground elements for scale. A flat horizon with no landmarks will produce a boring relief.
Text and Logos — Good but Use SVG Instead
Black text on a white background converts to crisp raised lettering. However, the heightmap approach adds slight rounding to edges due to anti-aliasing in the photo. For truly sharp text and logos, use SVG to STL which extrudes vector paths directly. Photo-to-3D for text is acceptable for casual projects but not professional results.
Complete Subject-by-Subject Guide: What Converts and What Fails
Beyond the basic four types, here is an exhaustive list of common photo subjects and how they perform in heightmap conversion, with specific tips for each.
Babies and Children — Challenging
Baby skin is smooth and evenly lit in most photos, producing very flat reliefs. Fix: Photograph near a window with side light to create natural shadow contours on the face. Avoid direct flash. Convert to B&W and boost contrast aggressively. Chubby cheeks and folds produce the best depth. Thin, expressionless faces produce the worst.
Wedding and Group Photos — Difficult
Multiple people in one frame create a busy heightmap where faces blend together. The background between people becomes unwanted raised areas. Fix: Crop to a single subject or couple. If you must convert a group, isolate each person in a separate crop and print individually. Group reliefs rarely look good.
Architecture and Buildings — Excellent
Straight lines, geometric shapes, and window recesses create dramatic 3D reliefs. Shoot on overcast days for even lighting that reveals facade detail without harsh shadows. Frontal elevation shots work best. Avoid extreme perspective (looking up at tall buildings) which distorts proportions in the heightmap.
Flowers and Plants — Good to Excellent
Petals have natural brightness variation and overlapping creates depth. Best: Single blooms against a dark or blurred background. Light-colored flowers on dark foliage produce the strongest relief contrast. Macro shots with shallow depth of field work beautifully because the blurred background naturally maps to lower height values.
Cars and Vehicles — Good
Reflective surfaces (paint, chrome, glass) create unpredictable brightness patterns. A car's glossy paint may appear bright white in one spot and nearly black in the reflection next to it. Fix: Shoot on an overcast day to minimize reflections. Side profile or three-quarter angle works best. Avoid head-on shots where the windshield creates a large dark rectangle in the heightmap.
Hands and Body Parts — Good
Hands have natural contour and texture. A held object or gesture creates interesting depth. Wedding ring photos (hands together showing rings) convert beautifully. Tip: slightly underexpose to preserve detail in lighter skin tones. Overexposed skin becomes a flat white plateau with no detail.
Food Photography — Variable
Plated food has complex textures that can produce fascinating or chaotic reliefs. Best: Single items with clear shape (burger, cake, pizza slice). Worst: Bowls of soup, salads with mixed ingredients. The heightmap cannot distinguish between a crouton and a tomato — it only sees brightness. Flat-lay shots from directly above work better than angled shots.
Screenshots and Digital Art — Good
Digital images have no camera noise, no lighting variation issues, and often have high contrast by design. UI mockups, game screenshots, and digital paintings convert cleanly because every pixel is intentional. Best format: PNG (lossless). Screenshots saved as JPEG add compression artifacts to an otherwise clean source.
The Complete Post-Processing Pipeline
What you do to your photo before uploading is just as important as the conversion settings. Here is the recommended workflow for each platform.
On Your Phone (Built-in Editor)
1. Crop to your subject. Remove distracting edges. 2. Apply the "Noir" or "Mono" filter to see the image in grayscale — this is your heightmap preview. If the B&W version lacks punch, the 3D version will too. 3. Increase contrast (+20 to +40) until shadows are dark and highlights are bright. 4. Slightly increase sharpness (+5 to +10) to define edges. Do not over-sharpen — halos around edges become raised ridges in the STL. 5. Export at maximum available resolution. Most phone editors silently downscale on export unless you check settings.
Adobe Lightroom (Desktop or Mobile)
1. Crop and straighten. 2. Auto-adjust exposure, then manually fine-tune. 3. Push Contrast to +30 to +60. 4. Pull Blacks down (-20 to -40) to create true dark areas. Push Whites up (+20 to +40) to create true bright areas. 5. Clarity +20 to +30 enhances mid-tone contrast which translates directly to surface texture. 6. In the Detail panel: Sharpening +40, Masking +50 (so sharpening only applies to edges, not flat areas). 7. Export as JPEG quality 100 or PNG. Resolution: set long edge to 2000px minimum.
Snapseed (Free, iOS/Android)
1. Tune Image: adjust brightness and contrast. 2. Details: Structure +20 to +30 (this is Snapseed's best feature for heightmap prep — it enhances local contrast without creating halos). Sharpening +20. 3. Curves: drag the bottom-left point right and the top-right point left to increase contrast with a smooth S-curve. 4. Black & White: apply and adjust the color filters. The red filter darkens skies, the blue filter darkens skin tones. Choose based on what you want to be recessed in the 3D relief. 5. Export at maximum size.
GIMP / Photoshop (Desktop)
1. Duplicate layer. 2. Apply a High Pass filter (Filters → Enhance → High Pass, radius 2-5px) to the duplicate. Set blend mode to Overlay at 50% opacity. This enhances fine texture without affecting overall contrast. 3. Add a Curves adjustment layer. Create an S-curve: pull shadows down 15%, push highlights up 15%. 4. Add a Black & White adjustment layer. Tweak the color sliders to control how different colors convert to gray. 5. Desaturate completely (or keep the B&W layer) and export as PNG. 6. Optional: use the Spot Healing Brush to remove dust, scratches, or unwanted objects that would create bumps in the heightmap.
Color Theory for Black and White Conversion
The heightmap algorithm converts color to grayscale using a luminance formula. Understanding this conversion lets you control which colors become light or dark in the final relief.
The Luminance Formula
Grayscale = 0.299×Red + 0.587×Green + 0.114×Blue. Green contributes over half the perceived brightness. Blue contributes almost nothing. Practical implication: A bright blue sky and a mid-green forest may appear equally "bright" to your eyes but produce very different grayscale values. The blue sky will be much darker in the heightmap than you expect. Always preview in B&W before converting.
Using Color Filters Before Conversion
In your photo editor's B&W conversion tool, color filters let you lighten or darken specific colors selectively: Red filter: lightens red tones (skin, lips), darkens blue tones (sky). Good for portraits — skin becomes brighter (more raised) and sky becomes darker (more recessed). Green filter: lightens foliage, darkens skin. Good for nature photos. Blue filter: lightens sky and water, darkens warm tones. Creates an ethereal, high-key look. Yellow/Orange filter: moderate contrast boost, similar to traditional B&W photography filters.
Skin Tone Mapping
Different skin tones convert to different grayscale values. Lighter skin (higher RGB values) maps to higher relief positions. Darker skin (lower RGB values) maps to lower relief positions. This is a limitation of the luminance-based algorithm, not a design choice. To equalize: adjust exposure before conversion, or use the Heightmap Editor's brightness slider to shift the overall height range. For the most natural portrait reliefs, use even, diffused lighting that minimizes the brightness difference between skin tones and features.
Photo to 3D Questions
- Is this true 3D or just a relief?
- This is a relief (2.5D). The heightmap maps a single brightness value per pixel to a single height value. This creates a raised surface that looks 3D from the front but is flat from the side, like a coin or a bas-relief sculpture. True 3D (photogrammetry) requires dozens of photos from different angles and specialized software. What our tool produces is highly detailed reliefs — not full 360-degree models. For most decorative 3D printing purposes (wall art, plaques, lithophanes), a relief is exactly what you want.
- How do I photograph a person for the best 3D portrait?
- Setup: Seat the person near a window with light coming from one side. No direct sunlight — use diffused daylight or a white curtain. Position them at a slight angle so the light falls across their face. Camera: Use your phone at eye level, about 1-2 meters away. No flash. Tap to focus on the eyes. Clothing: Solid colors work best. Busy patterns create noisy heightmaps. A simple dark or light shirt provides clean contrast against the face. After shooting: Crop tightly to the face and shoulders. Convert to black and white. Boost contrast +15. The B&W preview is essentially what your heightmap will look like.
- Can I convert an old scanned photo to 3D?
- Yes, but manage your expectations. Old photos have faded contrast, paper texture, dust, scratches, and often soft focus. Each of these translates to surface noise or flatness in the STL. Before uploading: scan at 600 DPI, restore contrast digitally, remove dust and scratches with a healing tool, and optionally apply gentle sharpening. The heightmap editor can help clean up remaining noise. The result will not be as crisp as a digital photo, but it can still produce a meaningful relief — especially for memorial or sentimental projects.
- Why does my photo look great on screen but produce a flat STL?
- Your screen displays a full-color image with contrast that your eyes perceive as depth thanks to shadows, colors, and edge detection. The heightmap algorithm strips all of that away and only looks at raw brightness values. A photo that appears "contrasty" to your eyes may actually have a narrow brightness histogram. Test: Convert your photo to grayscale. If the B&W version looks flat and muddy, the STL will be flat and muddy. Boost contrast until the B&W version has clear light and dark separation, then upload.
For specific photo formats, see our dedicated guides. For backlit photo displays, try the lithophane maker.